Developers are responsible for the consistency and stability of a product. But they can’t accomplish it without testing. In this article, we will learn how to set up the Mocha unit testing framework along with Chai which is an assertion library and write some simple tests.
Getting Started
Let's start by creating our project folder say testing & initialize it using npm init command:
mkdir testing
cd testing
npm init
& then install both Mocha & Chai as devDependencies:
npm install mocha chai --save-dev
To run it we are going to use the mocha command but I wanna be able to do npm run test so let's set up a test script in our package.json:

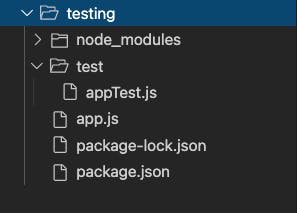
Project Structure

app.js- Entry pointtest- By default mocha looks for the test foldertest/appTest.js- Test file for our app.js
Time to Code
Let's create a simple function which returns the sum of two numbers & write a test to check if the function returns the intended output.
app.js
module.exports = (a, b) => {
  return a + b;
}
appTest.js
const assert = require("chai").assert;
const app    = require("../app");

describe("App", function(){
    it("should test if function returns 1+2 = 3", function(){
        assert.equal(app(1,2), 3);
    });
    it("should test if function returns -3+2 = -1", function(){
        assert.equal(app(-3,2), -1);
    });
});
Let's walk through the above code. At the top, we have required the assert module of Chai & our app.js file. This assert module provides several tests and is browser compatible. Then we have describe() & it() functions of Mocha to create the test.
describe()is simply a way to group our tests inMocha. We can nest our tests in groups as deep as we deem necessary. It takes two arguments, the first is the name of the test group, and the second is a callback function.
describe('string name', function(){
  // can nest more describe()'s here, or tests go here
});
it()is used for an individual test case. It takes two arguments, a string explaining what the test should do, and a callback function which contains our actual test.
it('should blah blah blah', function(){
  // Test case goes here
});
Now to write the actual test case we are using Chai's assert module. There are a number of different assertion tests included with assert. The one we’ve used is assert.equal(actual, expected). This tests equality between our actual and expected parameters using double equals ==.
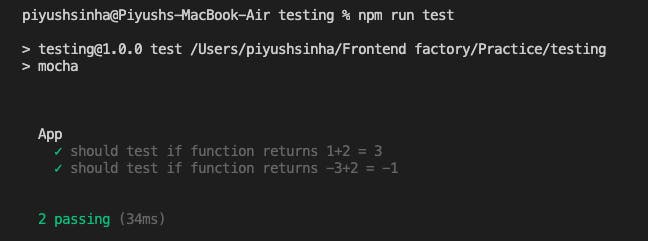
Run the Test
npm run test
Mocha outputs the results of the tests and shows them on the command-line:

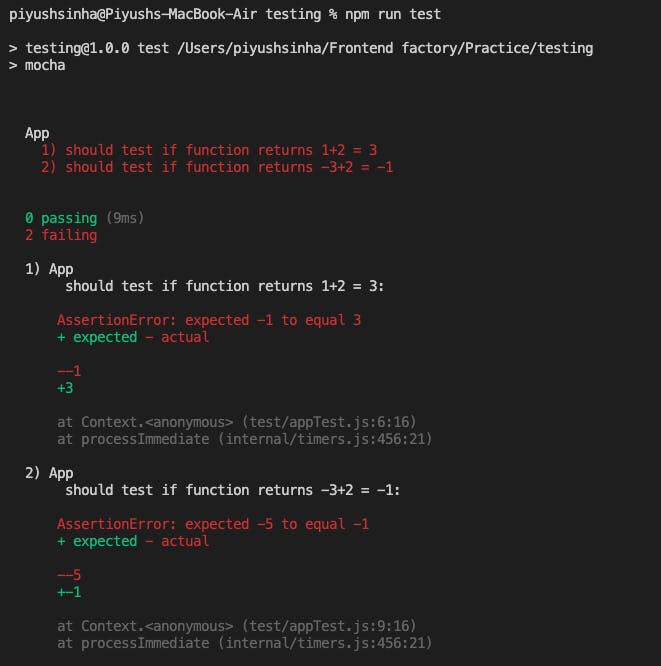
Failing Test Case
Assume that we have made a mistake when writing our function. We have added - operator instead of +.
app.js
module.exports = (a, b) => {
  return a - b;
}
When we run the tests again, both the test cases fail due to this mistake:

Because of unit testing, we are able to catch and correct mistakes like this easily without having to pour hours into finding where the bug is.
Conclusion
We can now (ideally) understand what Mocha is, how to set it up, how to group tests, and how to use an assertion library. We will discuss writing complex test cases, integration testing, and other testing practices, like using mocks in the coming articles.
I hope you've been enjoying my articles. If you found them useful, consider buying me a coffee! I would really appreciate it.

