If you’re a frontend developer, you’ve probably tried one or more of the code playgrounds out there — like CodePen, JSBin, JSFiddle — to figure out code issues or to discuss snippets and logic pieces with colleagues.
Let's build a working playground with basic functionality to run HTML, CSS & Javascript code snippets.
Getting Started
I'm using React for this mini-project. Feel free to use vanilla JS or any framework as it doesn't really matter here.
To create a project, run:
npx create-react-app my-app
cd my-app
npm start
Our playground will have two main components:
- MyTabs.js - HTML, CSS and JS tabs.
- Output.js - Rendered output for our snippets.
MyTabs.js
We will create HTML, CSS, and JS tabs inside this component. Each tab will hold a <textarea> for the respective code snippets.
import React, { Component } from "react";
import { Tabs, Tab } from "react-bootstrap";
import "./MyTabs.css";

class MyTabs extends Component {
  render() {
    return (
      <Tabs
        transition={false}
        defaultActiveKey="html"
        id="uncontrolled-tab-example"
      >
        <Tab eventKey="html" title="HTML">
          <textarea id="htmlTextarea"></textarea>
        </Tab>
        <Tab eventKey="css" title="CSS">
          <textarea id="cssTextarea"></textarea>
        </Tab>
        <Tab eventKey="js" title="JS">
          <textarea id="jsTextarea"></textarea>
        </Tab>
      </Tabs>
    );
  }
}

export default MyTabs;
Output.js
We will use <iframe> to render the code snippets. An iFrame is an inline frame used inside a webpage to load another HTML document inside it. This HTML document may also contain JavaScript and CSS which is loaded at the time when <iframe> tag is parsed by the user’s browser. This is exactly what we need.
import React, { Component } from "react";
import "./Output.css";

class Output extends Component {
  componentDidMount() {
    const iFrame = document.getElementById("iFrame").contentWindow.document;
    const htmlTextArea = document.getElementById("htmlTextarea");
    const cssTextArea = document.getElementById("cssTextarea");
    const jsTextArea = document.getElementById("jsTextarea");
    const runBtn = document.getElementById("runBtn");
    runBtn.addEventListener("click", function () {
      iFrame.open();
      iFrame.writeln(
        htmlTextArea.value +
          "<style>" +
          cssTextArea.value +
          "</style>" +
          "<script>" +
          jsTextArea.value +
          "</script>"
      );
      iFrame.close();
    });
  }

  render() {
    return (
      <div>
        <iframe id="iFrame" title="Output"></iframe>
      </div>
    );
  }
}

export default Output;
In the above code, we have defined an event Listener for the click event. In the function callback, opens the iframe#document, then we write to it via its writeln() function. We passed in the contents of the HTML, CSS and JS textareas concatenating them. The CSS content was placed in between <style> tag. JS content also in-between <script> tag.
Our mini-project is complete.
Playing in our playground
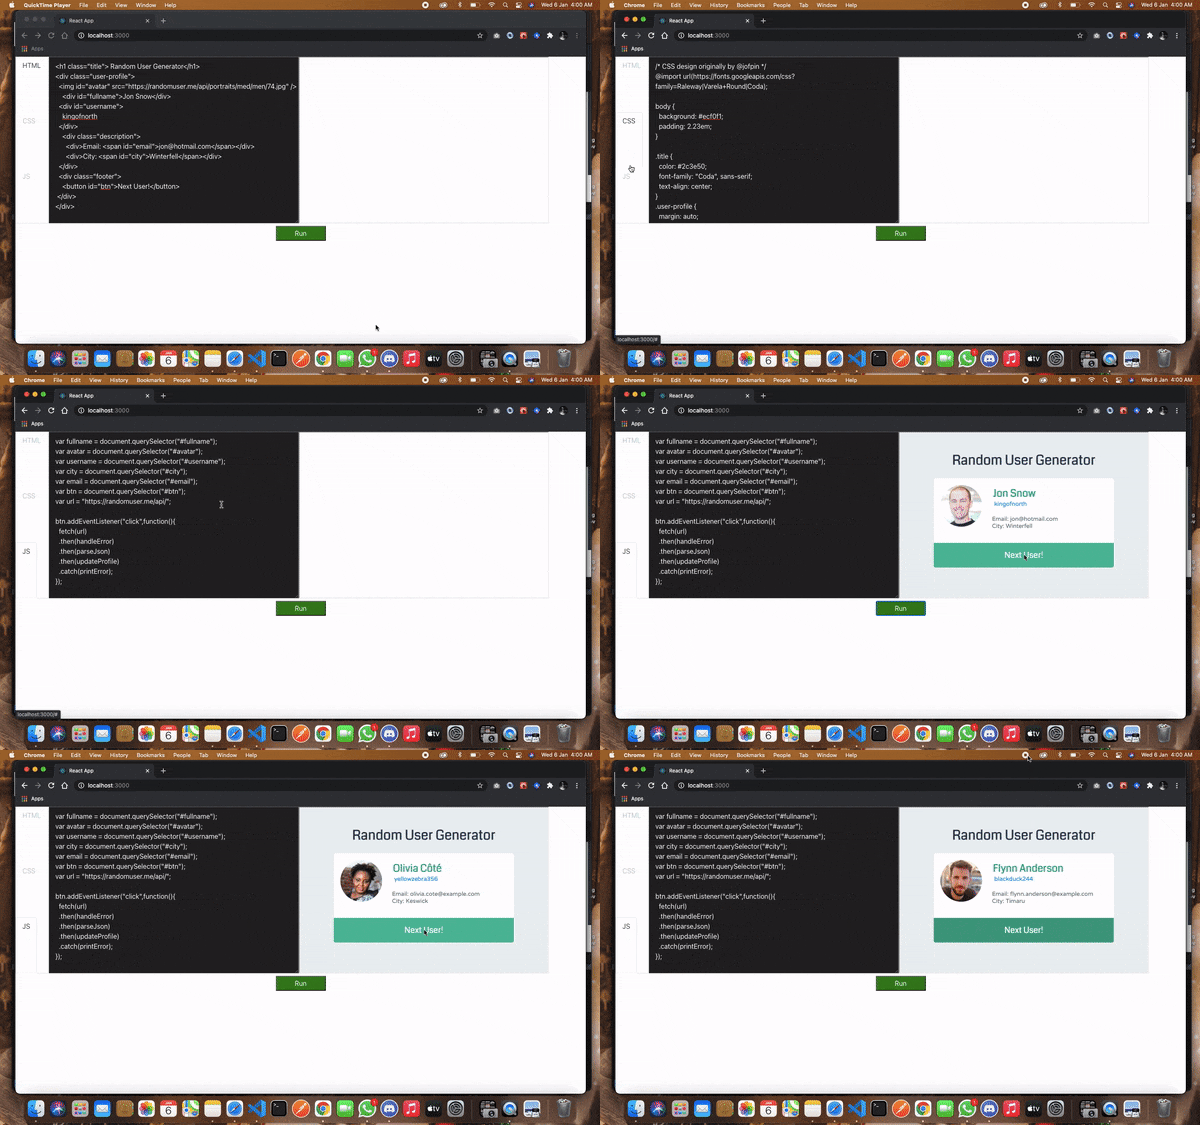
Let's head over to my favourite coding playground Codepen and try to run one of my pen in our playground.

It worked! Now, you can play around with the code and also, make the playground more fun.
If you have any problems, just respond to this article. Happy Coding!

